

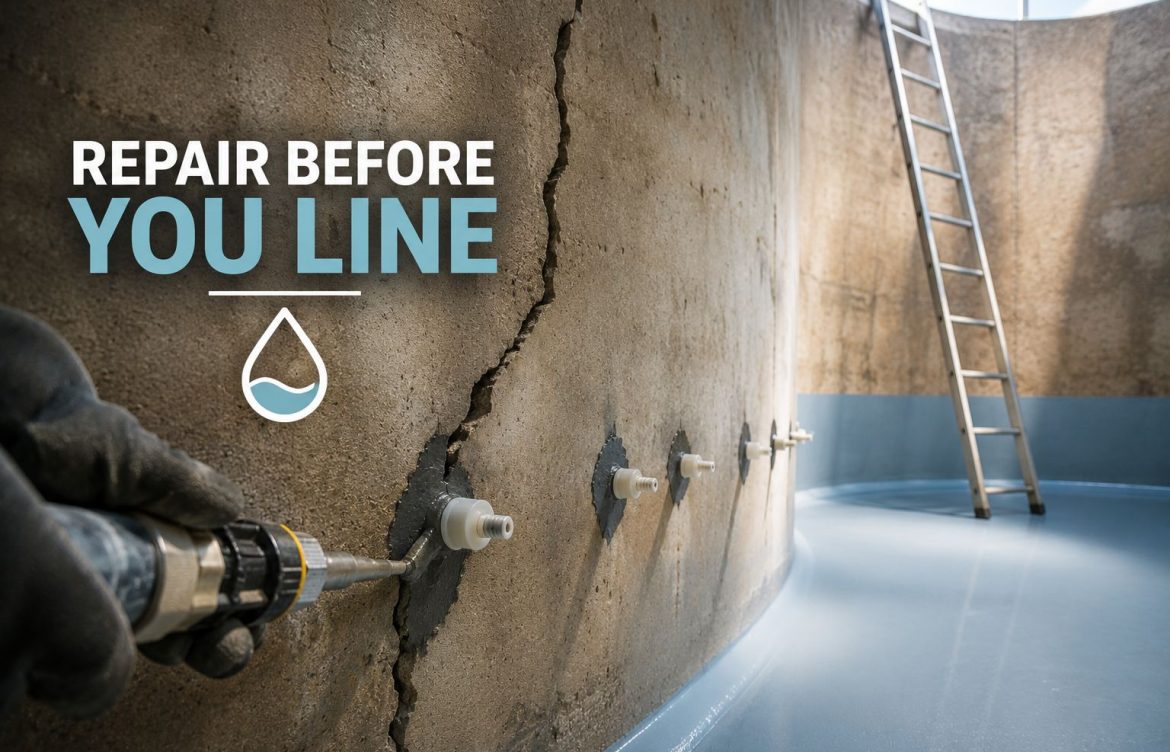
Repairing Cracked Concrete Water Tanks Before Lining
A new liner is not a fix for a cracked tank. That’s a hard truth a lot of tank owners run into after spending money on relining, only to watch the same water loss or seepage problem reappear months later. A liner is designed to protect a sound structure, not to bridge or hide structural damage underneath it. Skipping proper crack repair before lining doesn’t make the crack go away, it just hides it temporarily under a new surface that’s likely to fail at the exact same point.
This guide walks through how to assess cracking in a concrete water tank, what separates a crack that needs serious structural attention from one that’s more cosmetic, and which repair methods fit which type of damage, all before any liner goes on.
Why Crack Repair Has to Come First
Concrete cracks for a range of reasons: shrinkage during curing, thermal movement, soil settlement underneath the structure, hydrostatic pressure from groundwater, or age-related deterioration. Whatever the cause, an unaddressed crack remains a path for water movement, whether that’s stored water escaping outward or groundwater intruding inward, regardless of what gets applied on top of it.
Most liner systems, whether a bonded coating or a fitted membrane, are not designed to span an active structural crack. A coating applied directly over a moving crack will typically crack along with it, since the coating’s flexibility has limits, and a crack that continues to move after lining will eventually telegraph through the new liner. Even liner systems marketed as crack-bridging generally have a maximum crack width and movement tolerance, and exceeding that tolerance defeats the purpose of a crack-bridging product entirely.
This is why a proper tank restoration project treats crack repair and relining as two distinct phases, not one combined step. Get the structure sound first. Then apply the liner to a surface that’s actually ready to receive it.
Assessing the Crack: Structural vs. Non-Structural
Not every crack represents the same level of concern, and treating a cosmetic crack with an expensive structural repair wastes money just as surely as treating a structural crack with a cosmetic patch invites failure.
Non-structural cracks, often called shrinkage or surface cracks, typically form during the concrete’s initial curing period and don’t compromise the tank’s structural integrity. They’re usually narrow, don’t extend through the full wall thickness, and don’t show signs of ongoing movement. These can often be addressed with a straightforward sealing approach rather than a more involved structural repair.
Structural cracks indicate a more serious problem: settlement, overloading, reinforcement corrosion, or a design or construction defect. These often extend through the full thickness of the wall or floor, may show displacement between the two sides of the crack, and can continue to widen over time if the underlying cause isn’t addressed. Structural cracks require a repair method that restores load-bearing capacity, not just one that seals the surface.
Active vs. Dormant Cracks
Beyond the structural versus non-structural distinction, cracks also get classified by whether they’re still moving. A dormant crack has stabilized and isn’t expected to widen or shift further, generally because whatever caused it, initial shrinkage, for example, has run its course. An active crack continues to move, whether from ongoing settlement, seasonal thermal cycling, or other forces still at work on the structure.
This distinction matters enormously for repair method selection. A rigid repair material applied to an active crack will likely crack again at the same location once the underlying movement resumes, while a flexible sealant applied to a genuinely dormant crack may be using more capability than the situation actually requires. Monitoring a crack over a period of time, sometimes with a simple crack monitor gauge, can help determine whether it’s truly dormant before committing to a repair approach.
Common Crack Repair Methods
Epoxy injection is generally the go-to method for structural cracks in dormant condition. Epoxy is injected under pressure into the crack, filling the void and, once cured, restoring a meaningful amount of the concrete’s original structural continuity across the crack. This method works best on cracks that have stabilized, since epoxy is rigid once cured and doesn’t accommodate ongoing movement well.
Polyurethane injection takes a different approach, particularly useful for active leaks or cracks still experiencing minor movement. Polyurethane resins can be formulated to remain more flexible than epoxy after curing, and some formulations react with water to expand and seal actively leaking cracks even before injection is complete, which makes this method popular for cracks where water intrusion is an immediate, ongoing problem rather than a dormant condition.
Routing and sealing involves widening the crack along its surface into a controlled groove, then filling that groove with a sealant. This method is common for non-structural cracks or as a surface-level treatment, though it addresses the crack at the surface rather than restoring structural continuity through the full depth of the wall.
Structural stitching uses metal staples or dowels installed across a crack to mechanically tie both sides together, restoring load transfer across the crack. This method is typically reserved for more significant structural cracks where injection alone isn’t considered sufficient to restore the necessary strength.
Cementitious patching uses a cement-based repair mortar for surface spalling or shallow damage rather than through-cracks specifically. It’s a common companion repair alongside crack injection when a tank has both cracking and surface deterioration to address.
Crack Repair Method Comparison
| Method | Best For | Structural Restoration | Handles Active Movement |
|---|---|---|---|
| Epoxy injection | Dormant structural cracks | Yes, strong | No, rigid once cured |
| Polyurethane injection | Active leaks, minor ongoing movement | Limited, seals more than structurally restores | Yes, more flexible |
| Routing and sealing | Non-structural, surface-level cracks | No | Depends on sealant flexibility |
| Structural stitching | Significant structural cracks | Yes, mechanical | No |
| Cementitious patching | Surface spalling, shallow damage | No | No |
The Assessment and Repair Process
- Drain and fully dry the tank. Accurate crack assessment requires a dry surface, since water can mask both the extent and the active or dormant status of a crack.
- Document every crack, noting location, width, whether it extends through the wall, and any visible displacement or efflorescence that might indicate ongoing water movement through the crack.
- Monitor questionable cracks over time if there’s uncertainty about whether they’re dormant, rather than assuming and potentially selecting the wrong repair method.
- Select the repair method based on the specific crack’s classification, not a single blanket approach applied to every crack in the tank regardless of its type.
- Complete all structural repairs and allow proper cure time before moving to surface preparation for the new liner.
- Re-inspect after repair to confirm the repair has taken properly before proceeding to lining.
Rushing from crack repair straight into lining without allowing adequate cure time, or without a follow-up inspection, is a common way a rushed project ends up needing to be redone. For a full look at what the relining process itself involves once the structure is sound, our guide on repairing and relining underground water storage picks up exactly where this article leaves off.
Things to Consider Before Repairing
- Has each crack been individually classified as structural or non-structural, and active or dormant, rather than treated uniformly?
- Is the tank fully drained and dry enough for an accurate assessment?
- Does the selected repair method match what the crack actually needs, rather than defaulting to whichever method is fastest or cheapest?
- If the tank stores potable water, will the repair materials themselves need certification consideration alongside the liner that goes on afterward?
- Is there a plan to re-inspect after repair and before lining begins, to confirm the repair has held?
For tanks intended for drinking water storage, material certification considerations don’t stop at the liner. Repair materials used within a potable water tank may also need appropriate certification depending on the specific application and local requirements, which is worth confirming alongside the broader certification planning covered in our guide on lining materials and certification for rainwater catchment tanks.
Why This Step Gets Skipped More Than It Should
Crack repair adds cost and time to a relining project, and it’s tempting to view it as an optional upgrade rather than a required step, especially when a crack looks minor. But the growing attention on cistern failures across the country, covered in our piece on why cistern failures are drawing national attention, reflects exactly this pattern: problems that started small and were deferred rather than properly addressed, eventually becoming failures serious enough to draw public notice.
A tank owner weighing whether to invest in proper crack repair before lining is really weighing a smaller cost now against a much larger one later, when a liner applied over unrepaired structural damage fails and the entire project needs to be redone from the beginning, crack repair included.
Maintenance After Repair and Lining
Once a tank has been properly repaired and relined, periodic inspection remains important, particularly during the first year when any residual settlement or movement not fully captured during initial assessment might reveal itself. Checking for any new hairline cracking, monitoring water clarity and level trends, and addressing any new issues promptly rather than letting them develop keeps a properly repaired tank in the condition the repair was meant to achieve. Our guide on cistern liner coatings covers what ongoing liner performance and maintenance should look like once the tank is back in service.
Frequently Asked Questions
Can a liner be applied directly over a cracked concrete tank without repair?
This is generally not recommended for structural or active cracks, since most liner systems aren’t designed to span ongoing movement, and a crack left unrepaired will typically telegraph through the new liner over time.
How do I know if a crack is structural or just cosmetic?
Structural cracks often extend through the full wall thickness, may show displacement between the two sides, and can indicate an underlying cause like settlement or reinforcement corrosion. A qualified inspection is the most reliable way to make this determination rather than a visual guess.
What’s the difference between epoxy and polyurethane crack injection?
Epoxy is rigid once cured and best suited to dormant structural cracks needing strength restoration. Polyurethane remains more flexible and is often preferred for active leaks or cracks with minor ongoing movement, since it can better accommodate that movement without cracking again.
How long should a repair cure before lining begins?
This depends on the specific repair material and product used, so following that product’s documented cure time rather than a general assumption is important, along with a follow-up inspection to confirm the repair has taken properly.
Is crack repair covered under a standard relining project, or is it a separate cost?
This varies by contractor and project scope, so it’s worth clarifying upfront whether crack assessment and repair are included in a relining quote or need to be budgeted separately, since assuming it’s included when it isn’t can lead to an incomplete repair down the line.
Conclusion
A liner protects a sound tank. It doesn’t fix a damaged one. Taking the time to properly assess every crack, classify it accurately, and repair it with the method that actually matches the damage is what makes a subsequent relining project last. Skipping this step to save time or money upfront tends to cost more in the long run, when the same crack reappears through a new liner and the entire project has to be redone, this time with the added cost and disruption of removing a liner that never should have gone on over unrepaired damage in the first place.
Comments